Build your WooCommerce store
Building an online store with WooCommerce is a fantastic way to jumpstart your e-commerce journey. Whether you’re a small business owner, a solo entrepreneur, or simply looking to expand your brick-and-mortar store into the digital world, WooCommerce offers a user-friendly and customizable platform to create a powerful online presence.
With WooCommerce, you can easily manage your products, process transactions securely, and provide an excellent shopping experience for your customers. Plus, it seamlessly integrates with WordPress, making it accessible to anyone familiar with the world’s most popular website builder.
So, if you’re ready to take your business to the next level, WooCommerce is your go-to solution for building a successful online store. Start today and watch your online business thrive. This guide will walk you through building an online store on WooCommerce, from installation to launching your first product.
Table Of Contents Hide
- How to build an online store on WooCommerce?
- Step 1: Decide on a business name
- Step 2: Choose your hosting provider
- Step 3: Install WordPress
- Step 4: Install WooCommerce
- Step 5: Install StoreBuild Plugin
- Step 6: Install and Activate Elementor
- Step 7: Configure WooCommerce Settings
- Step 8: Set Up StoreBuild Templates
- Step 9: Customize Your Store Pages
- Step 10: Add Products
- Step 11: Configure StoreBuild Settings
- Step 12: Test Your Store
- Step 13: Launch Your Store
How to build an online store on WooCommerce?
With WooCommerce, you can easily manage your products, process transactions securely, and provide an excellent shopping experience for your customers. Plus, it seamlessly integrates with WordPress, making it accessible to anyone familiar with the world’s most popular website builder.
Step 1: Decide on a business name
Choosing a business name is an essential first step in starting your WooCommerce store. Your business name should be catchy, memorable, and reflect your brand’s identity. It’s important to check if the name is available as a domain and isn’t already used by another business. Once you’ve decided on the perfect name, you can use it to create a unique brand for your online store. This will make it easier for customers to find and remember you.
Step 2: Choose your hosting provider
Choosing the right hosting provider is crucial for the success of your WooCommerce store. A reliable hosting provider ensures that your website runs smoothly, loads quickly, and remains secure. Look for hosting services that offer WooCommerce-specific packages, as these will be optimized for your online store’s needs. Popular options include Bluehost, SiteGround, and WP Engine. Consider factors like customer support, uptime guarantees, and scalability when deciding. A good hosting provider will play a major role in the overall performance and success of your WooCommerce store.
Step 3: Install WordPress
- Look for the WordPress installer in the cPanel. It might be under “Website” or “Softaculous Apps Installer.”

- Click on the WordPress installer. You’ll be prompted to select the domain where you want to install WordPress. Fill in the required details such as your site name, username, and password.

- Once you’ve entered the necessary information, click “Install.” The installer will set up WordPress on your chosen domain.
- After the installation, you can access your WordPress dashboard by going to yourdomain.com/wp-admin. Log in using the username and password you created during installation.

- And you’re all set! You can now start customizing your new WordPress site.

Step 4: Install WooCommerce
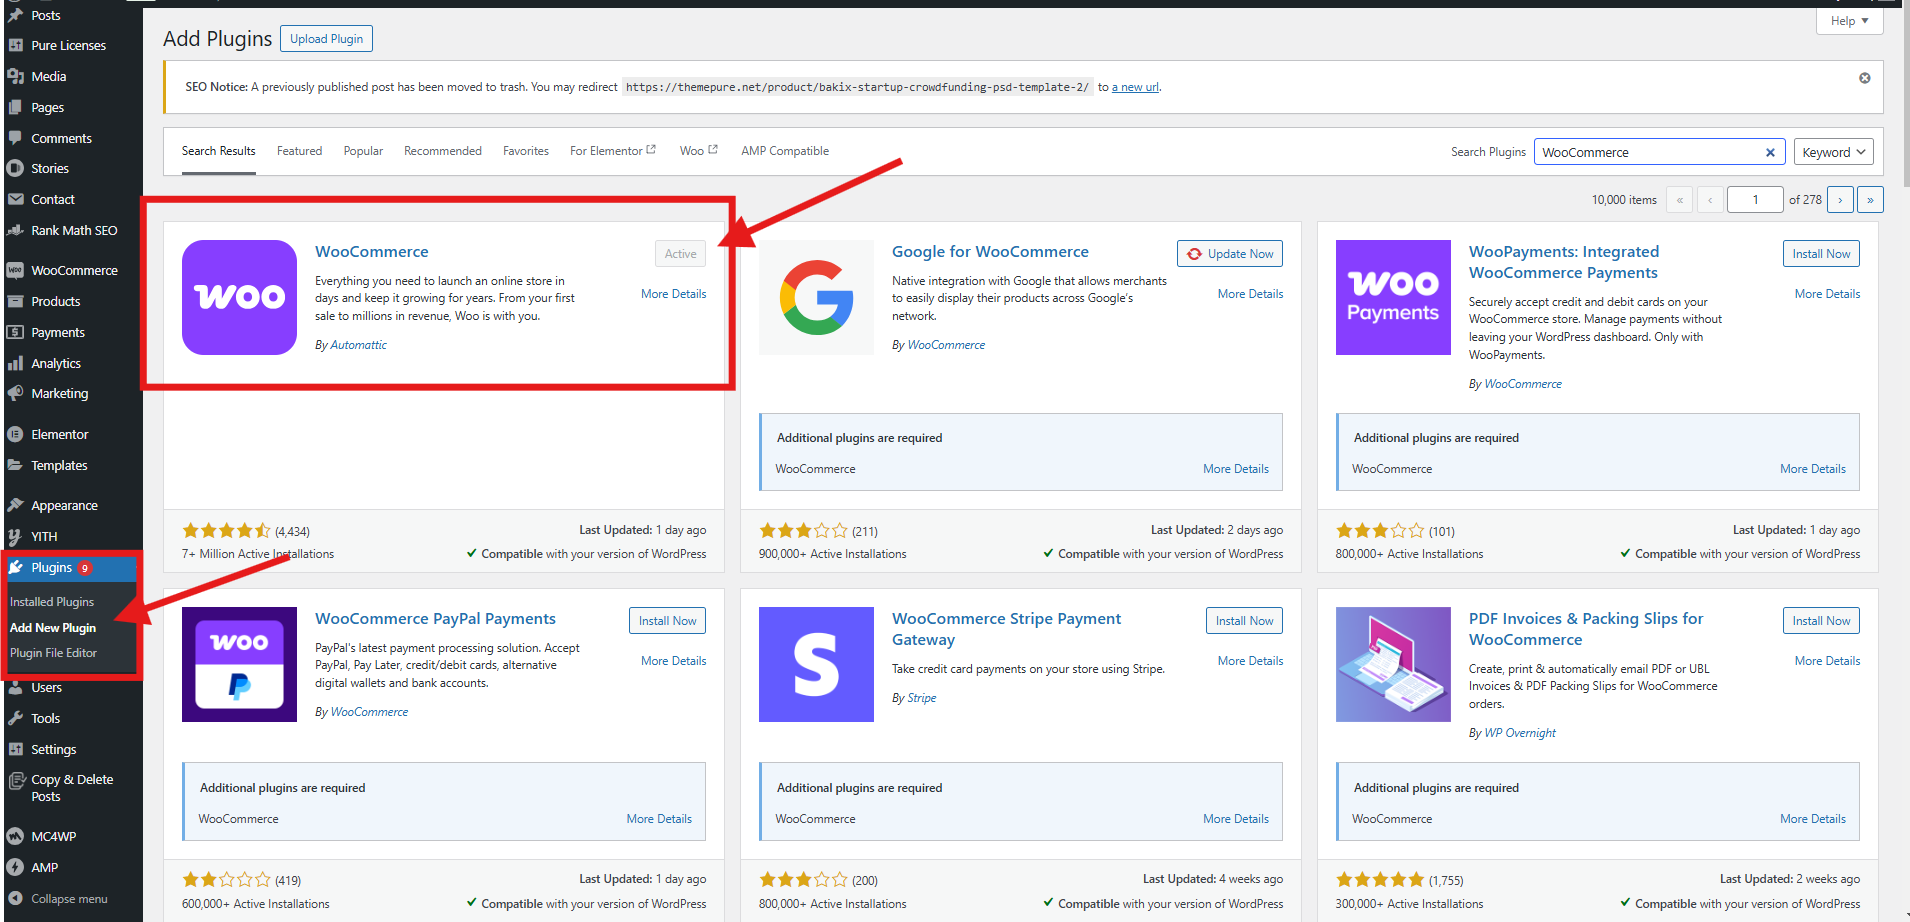
First, install and activate the WooCommerce plugin on your WordPress site. You can do this from the WordPress plugin repository.
Step 5: Install StoreBuild Plugin
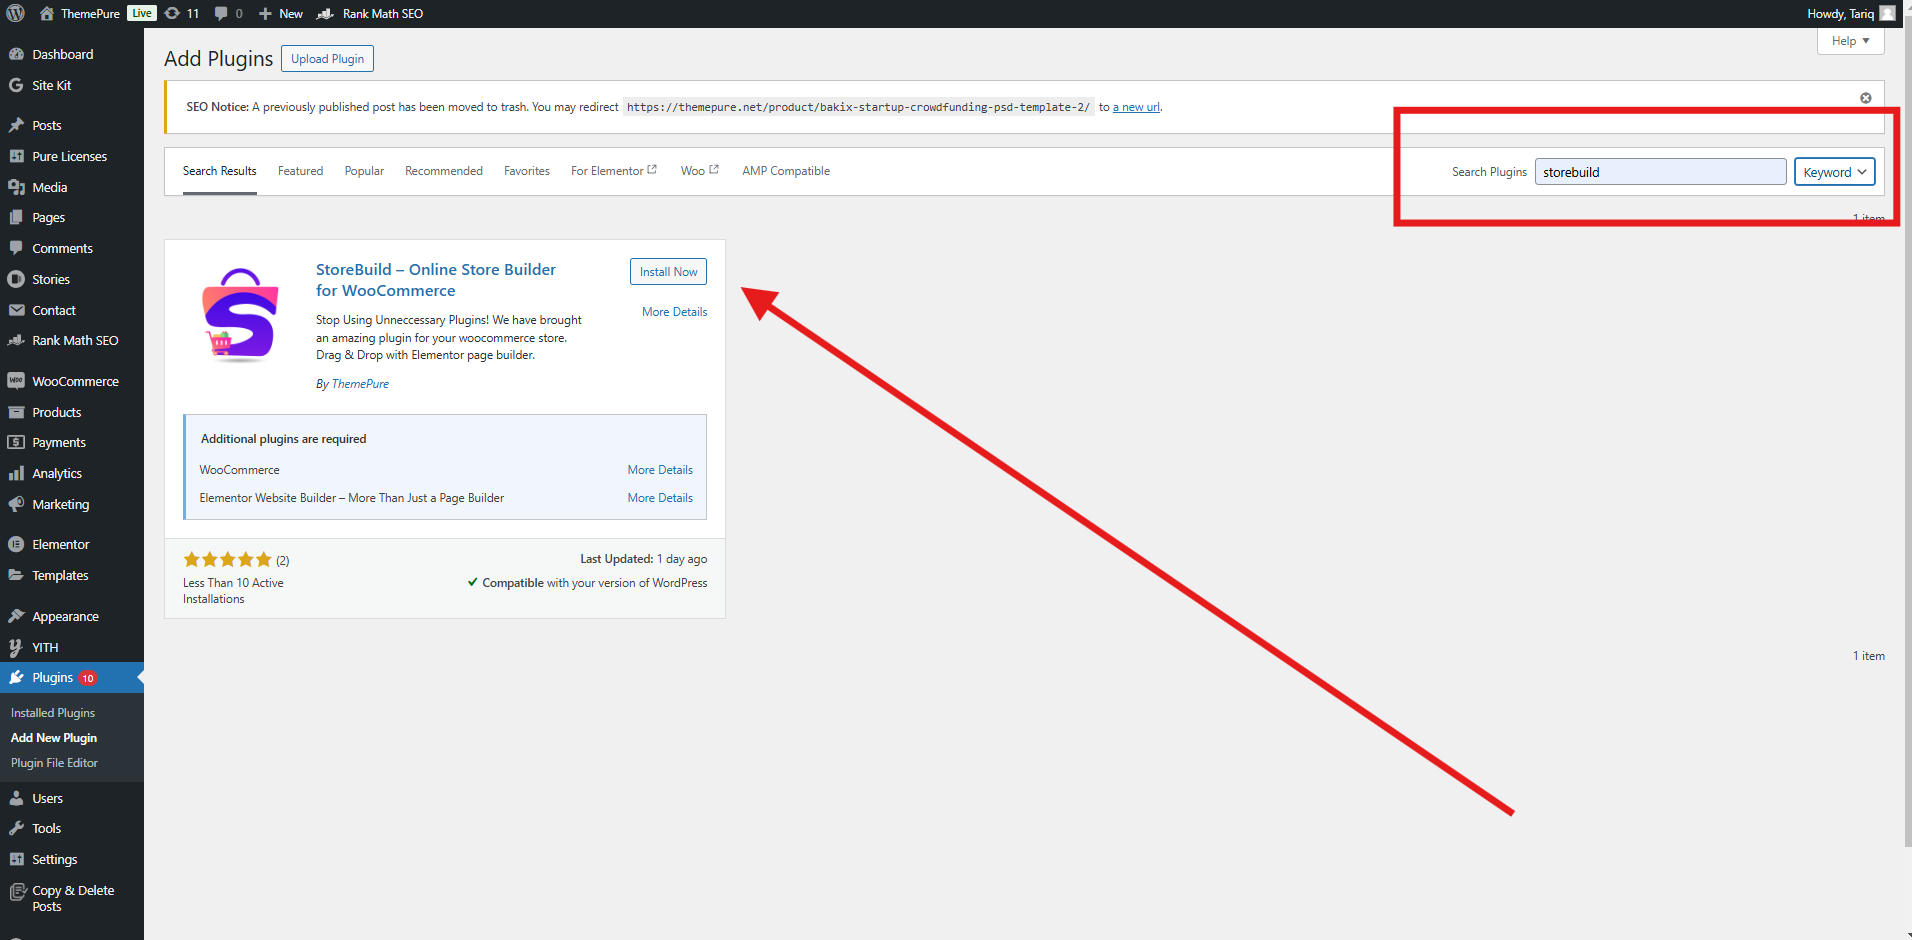
Go to Plugins > Add New in your WordPress dashboard, search for “StoreBuild,” and click “Install Now” followed by “Activate.”
Next, add products by entering their details—including names, descriptions, prices, and images. Customize your store’s appearance by choosing a suitable theme that aligns with your brand. Finally, test your store by simulating a purchase to ensure everything works seamlessly.
Step 6: Install and Activate Elementor
-
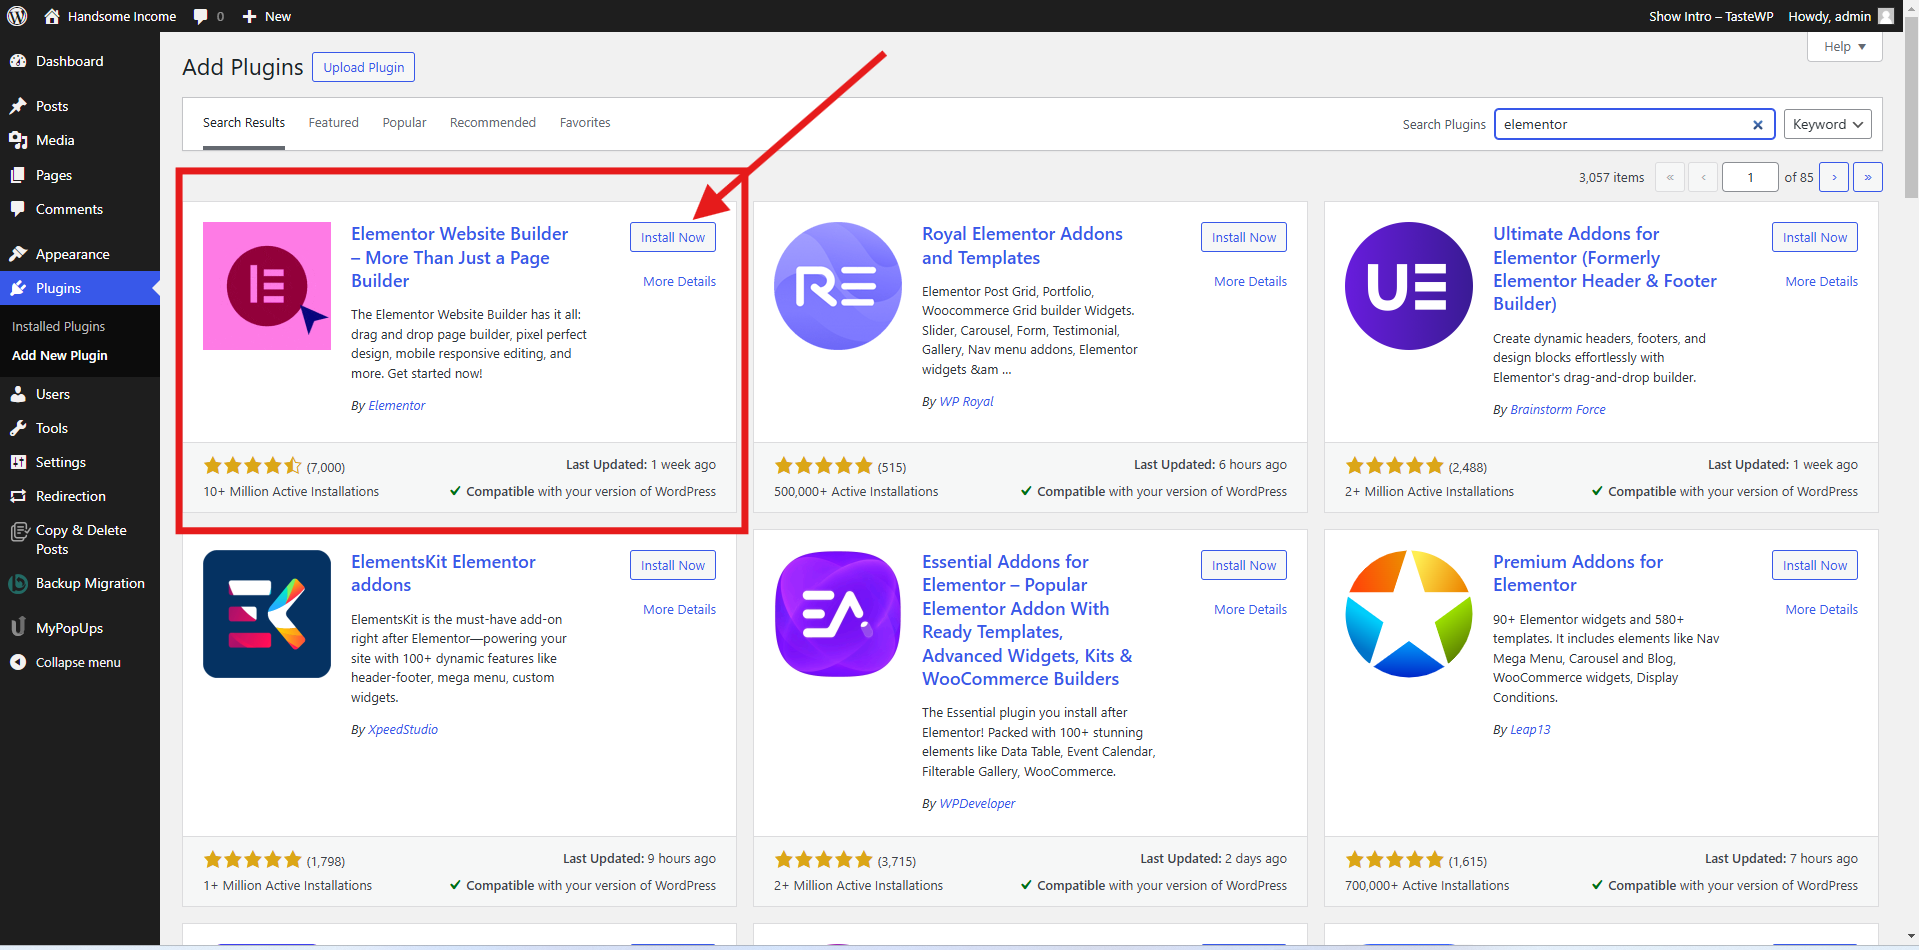
- StoreBuild requires the Elementor Page Builder plugin. If you don’t have it installed yet, go to Plugins > Add New, search for “Elementor,” and click Install Now, then Activate.
Step 7: Configure WooCommerce Settings
-
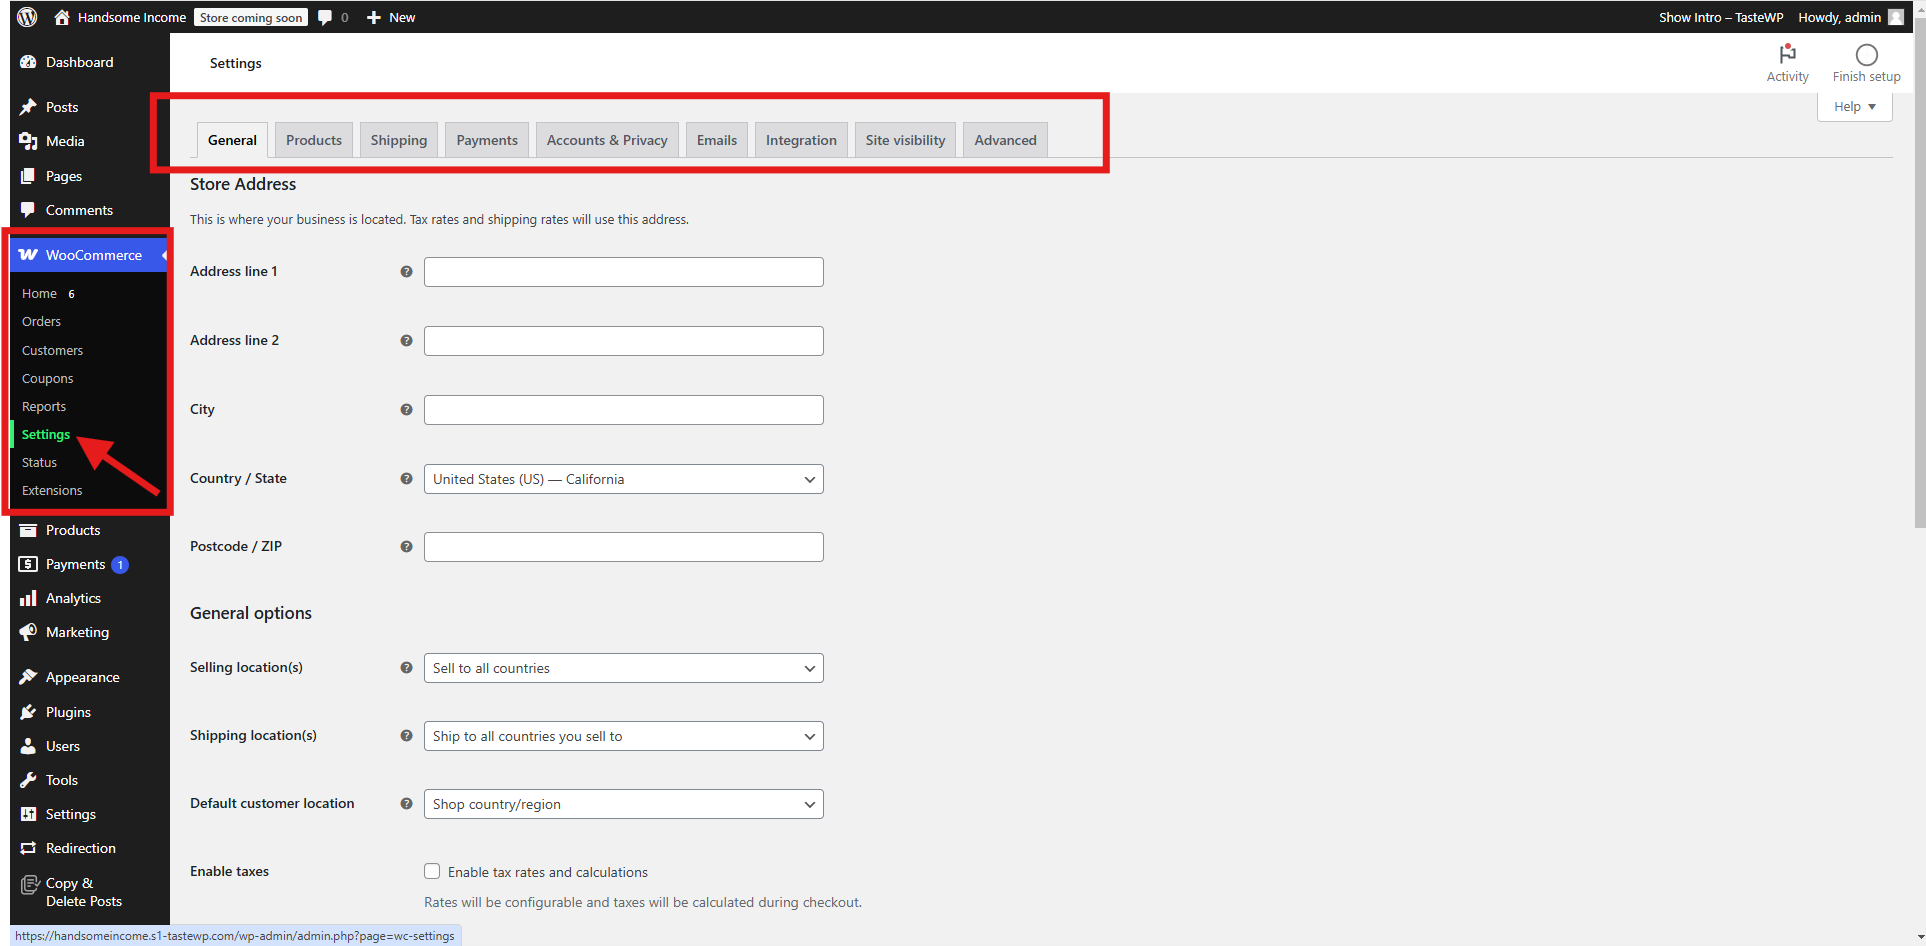
- Once WooCommerce is activated, you will see a setup wizard that guides you through the initial setup of your store. You can configure basic settings such as store location, currency, and preferred payment methods.
- To fine-tune your settings, go to WooCommerce > Settings in your WordPress dashboard. You can configure shipping options, tax settings, and email notifications here.
Step 8: Set Up StoreBuild Templates
-
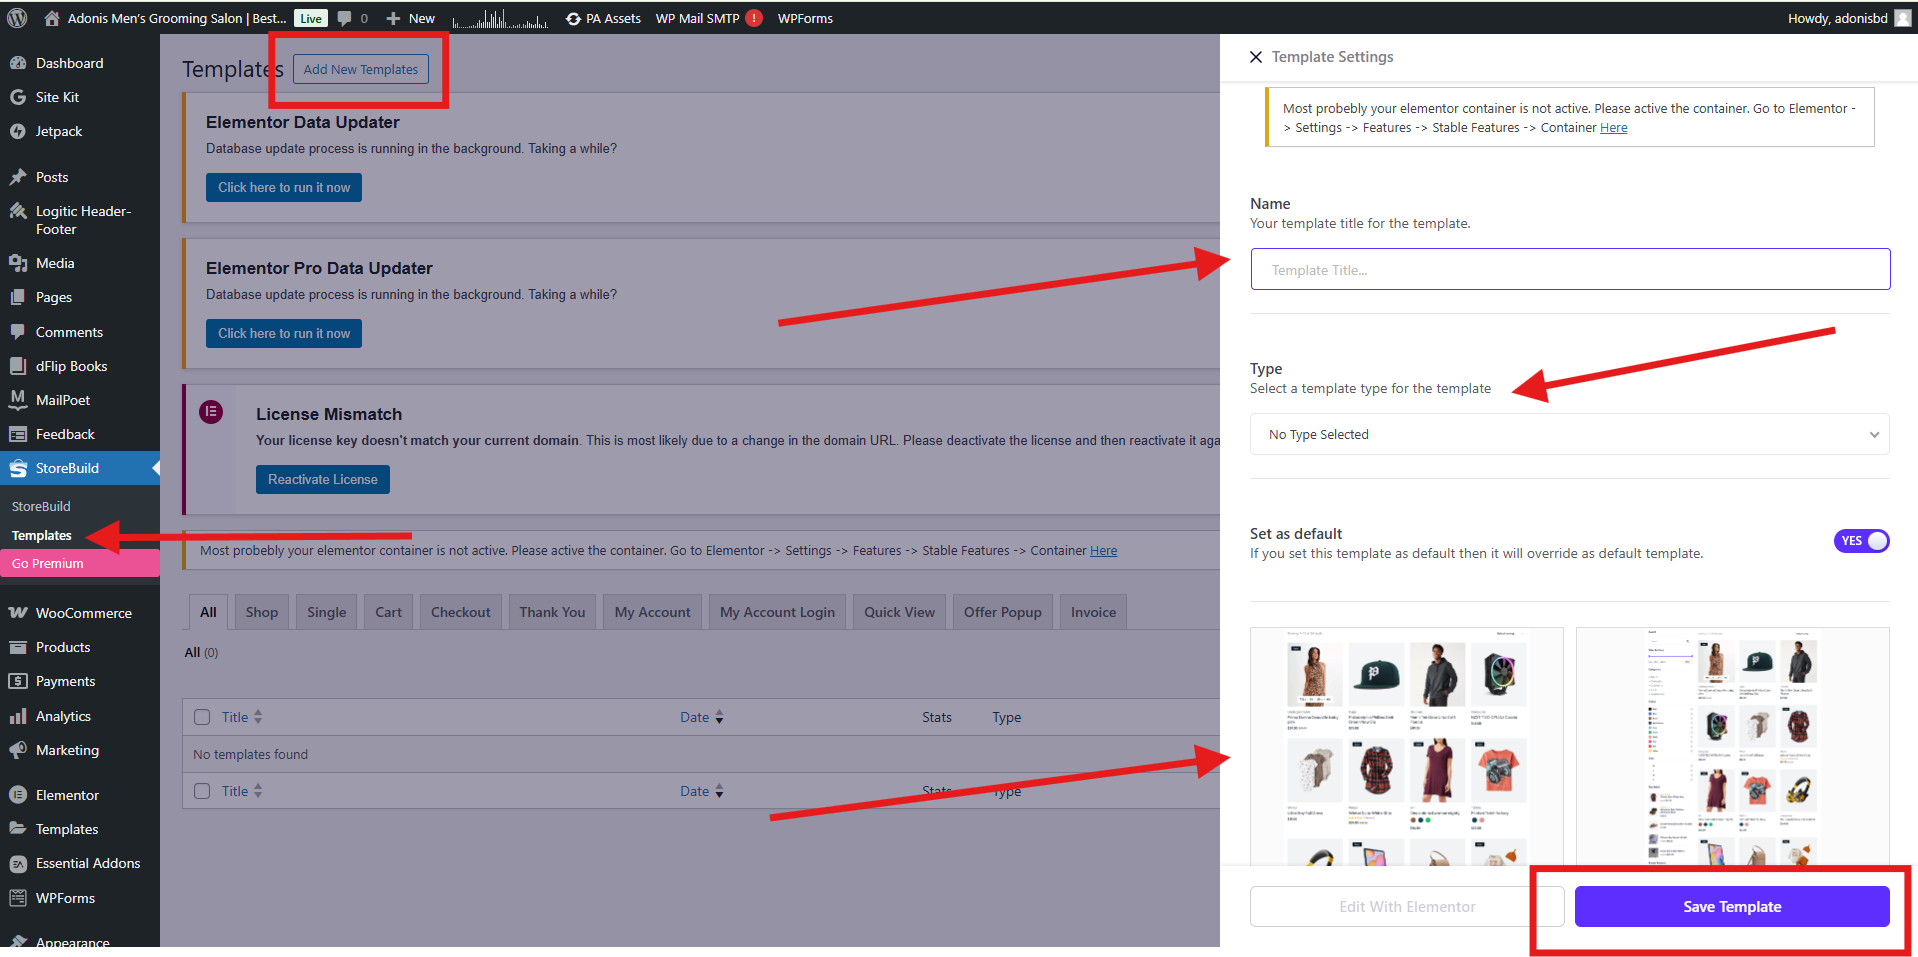
- Go to StoreBuild> Templates > Add New. Choose the type of template you want to create, such as “Product Archive,” “Single Product,” or “Cart Page.”
- Customize these templates using the StoreBuild widgets. For example, you can add a product carousel, quick view buttons, and sales notifications.
- You can also import pre-designed templates from StoreBuild to speed up the process.
Step 9: Customize Your Store Pages
-
- With the templates set up, go to Pages in your WordPress dashboard. Edit your store pages (Shop, Cart, Checkout, etc.) using Elementor.
- Drag and drop StoreBuild widgets to design your pages as you like. You can customize every aspect of your store, including the layout, fonts, colors, and images.
Step 10: Add Products
-
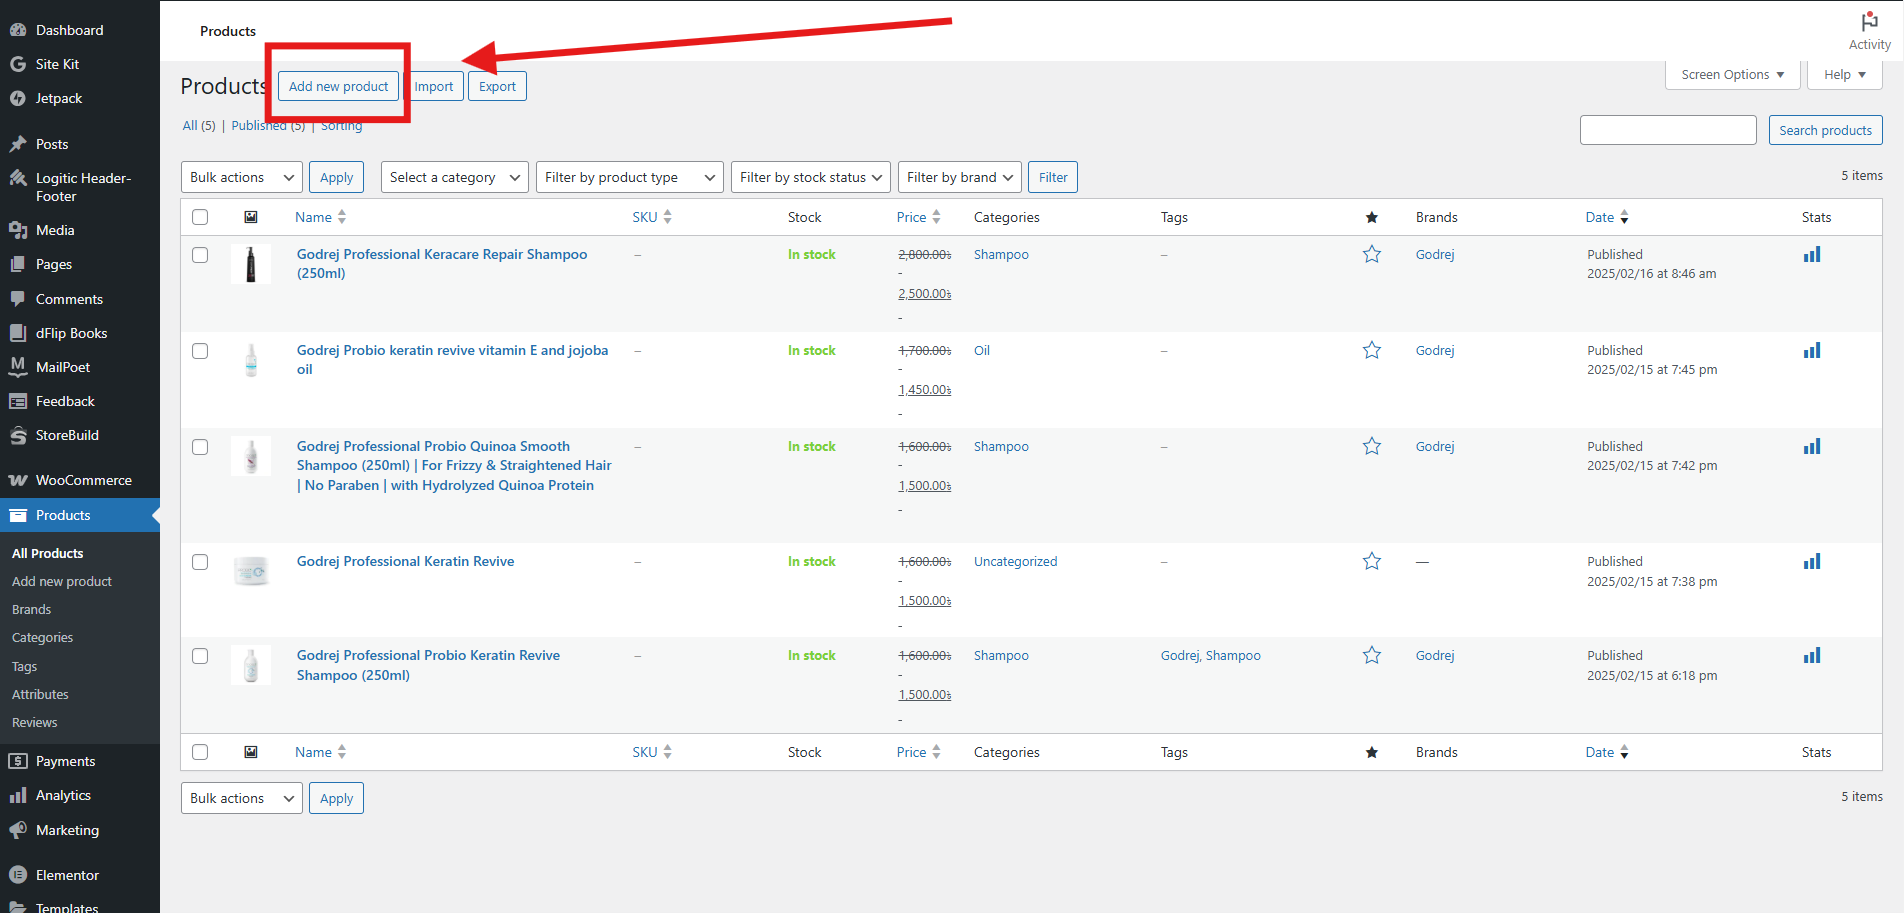
- Go to Products > Add New in your WordPress dashboard. Enter the product name, description, price, and other details.
- Upload product images and set the featured image for each product.
- Use product categories and tags to organize your products and make it easier for customers to find what they want.
Step 11: Configure StoreBuild Settings
-
- Go to StoreBuild settings to configure various options for your store, such as enabling AJAX add-to-cart, setting up a wishlist, and configuring product comparison features.
- You can also customize the appearance of your store with StoreBuild’s styling options.
Step 12: Test Your Store
-
- Before launching your store, thoroughly test all aspects to ensure everything works correctly. Place test orders to check the checkout process, payment gateways, and shipping calculations.
- Make sure all product pages are displaying correctly and that there are no broken links or missing images.
Step 13: Launch Your Store
-
- Once you are satisfied with the setup and functionality of your store, you can launch it. Announce the launch on your social media channels and start promoting your products.
- Monitor your store’s performance and make any necessary adjustments based on customer feedback and sales data.
The StoreBuild documentation is available here. It provides detailed instructions on using the plugin, customizing your WooCommerce pages, and utilizing various widgets and templates.


